How do I replace screen mesh with pet screen mesh?
Note: You can click on any image in the article below to see the actual product on Amazon.com.
If the screen frame is still good then it's often a relatively simple DIY project to replace the screen mesh that your pet has already torn up or that you fear your pet can tear through.
What you need

Utility Knife
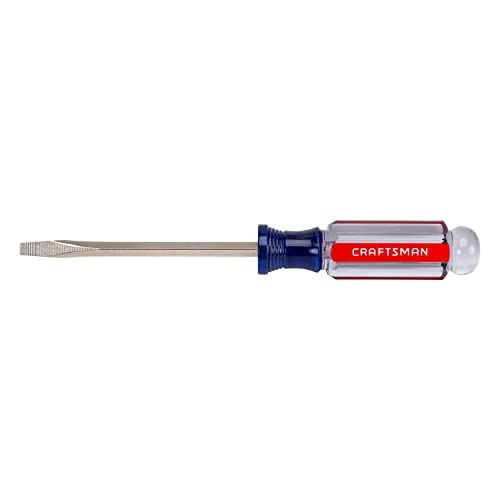
Flathead Screwdriver
If you already have the first two items above on hand then you can buy a kit that has the rest of what you need for installing a pet screen.

You get more choices however on the pet screen mesh and spline size if you buy things separately.

Screen Mesh
You want to get screen mesh that's made for pets that is stronger and more scratch and tear resistant.
Measure the length and width of your screen frame at the spline channel (where the mesh is attached), add about two or three inches extra for both the length and width (so you have enough mesh to work with), and buy a roll of pet screen mesh that covers that area.

Spline Roller
Check the description of the spline roller to make sure it's right for the spline size you're using.

Spline
Spline comes in different widths and lengths. If you can't reuse the existing spline then you'll need to buy some new spline.
Spline length is often sold in 25 foot or 100 foot packages. Add up the lengths of all four sides of the screen frame at the spline channel. You'll need at least that much spline.
Spline width is most often labelled in the U.S. by decimal of an inch. But it may be easier on some measuring devices to use milimeters (mm) and then convert between decimal of an inch and centimeters (cm). - remember 100 millimeters equals 1 centimeter, so 32mm equals .32cm. There is also a trick using stacked coins to determine spline width.
Watch the video below for inch to centimeter conversions and the stacked coin trick for common spline sizes.
How to install the pet mesh
Watch the video below for an example of how to install the pet mesh then follow the steps on this page.
Steps to remove old screen mesh
1. Remove the screen frame from the window or door
This will vary between screens.
Many windows will involve pulling tabs up, down, or sideways then pulling outward. Others may require pushing the screen up, down, or sideways to free an edge before pulling the frame out. If that doesn't work then look for screws or other attachments that might be holding the screen in.
Screen doors often ride upon rollers that can be adjusted with screws. In those cases you'll likely need to screw the rollers away from the tracks or channels before the frame can be removed. There may be rollers on the top as well as the bottom.
2. Find the end of the existing spline
Generally, the spline will be one long piece of rubber pressed into the spline channel holding the edge of the screen in place. At one of the four corners you'll find both the beginning and end of the spline. Take the flathead screwdriver and gently pry one end of the spline out of the channel (you can also use a long nail or something similar).
3. Remove the spline from the channel
Continue removing the rest of the spline starting with the end that you pryed from the channel. Use the flathead screwdriver if needed to help with the process being careful not to damage the spline if you want to reuse it. You may find that you don't have one long spline but several smaller splines pieced in. If so, you'll need to find the ends of those and remove each piece separately.
4. Remove the screen mesh
There shouldn't be anything holding the screen in once the spline has been removed. Push or pull the screen mesh out of the frame noticing if there's anything else keeping it attached.
5. Clean the spline channel
The spline channel may be dusty or dirty. Wipe or brush any dust or debris out of the channel. You can wash it out if you'd like (if you do so you may want to make sure it's dry before installing new mesh).
Steps to install new screen mesh
1. Cut the mesh to size
Roll out the mesh over your screen frame. Cut the mesh so there's an inch or two extra on each side of the screen frame at the spline channel. In other words, you'll want at least an inch or two extra mesh to work with on each side when you begin attaching the mesh to the frame.
2. Begin inserting the spline
With the mesh in position, use the screwdriver to push one end of the spline over the mesh into the spline channel at one of the corners. You can optionally use the spline roller instead of the screwdriver if that works for you.
3. Roll one strip of the spline
Use the spline roller to finish rolling the spline into the channel on that first side. It's at this point that you'll notice whether the spline size is right for the project.
- If the spline is too thin it will be easy to roll the spline but it won't be tight enough to keep the mesh attached. You'll need to get thicker spline.
- If the spline is too thick it will be difficult to roll the spline. However, it still may be usable. One trick to try is to stretch the spline by pulling on it as you roll it.
Also, if you have two rollers on your spline roller then try each to see which works best for you.
4. Roll the rest of the spline
Roll the spline for the remaining three sides of the screen. You can use the screwdriver to better insert the spline into the corners if you like. Make sure the mesh is taught and smooth as you roll the spline but not so tight that it will pull so strongly on the frame that the frame bends or bows.
If the mesh has wrinkles or sags then you may want to remove some of the spline, tighten the mesh, and re-roll that part of the spline.
5. Cut the spline and trim the mesh
Once you've got the mesh right then cut the end of the spline so that you can tuck it snuggly against the beginning of the spline.
Trim off the excess mesh by resting the side of your knife blade against the top of the spline with the cutting edge against the outside edge of the spline channel and the excess mesh. Lightly run the blade around the four sides of the screen cutting off the excess mesh. It may take a little extra effort to cut around the corners.
Be careful not to cut the spline or the screen frame itself (especially if it has a coated surface).
6. Reinstall the screen
Lastly it's simply a matter of reinstalling the screen and giving your work one final check.